A drip campaign is a feature included in our Pro and Elite plans and allows you to send up to 9 scheduled follow-up messages after the 1st one in each campaign. This will make it easier to manage contacts and keep them interested.
Please check this video for a quick tutorial or check a step-by-step guide below:
To enable and set up the Drip campaign follow these steps:
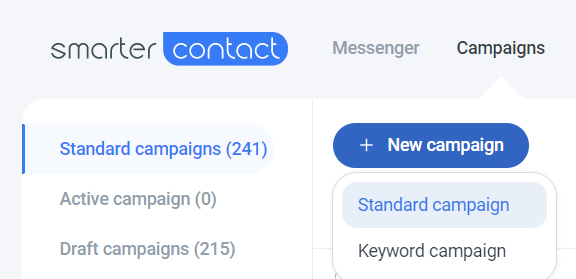
1. Go to the Campaigns page and click New Campaign -> Standard campaign
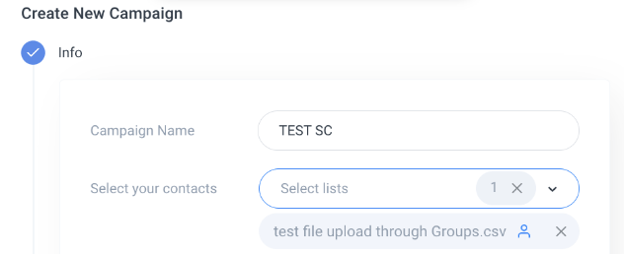
2. Type the Name and Select the group
3. For Message #1 select:
• Campaign type
• Select your message templates
- Phone number
• Schedule your campaign
• Set up the campaign throttling by selecting Send all messages at once? - Set up the message running period by selecting Run a message for a set period.
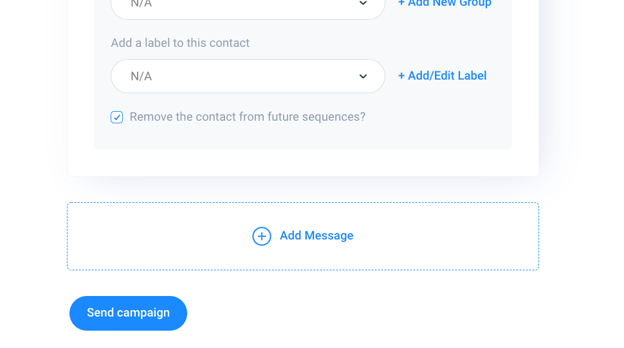
4. Enable Rules for Messages:
• Execute Rule When (Contact replies (SMS or Call); Contacts replies SMS; Contact Replies Call; No contact reply (24 hours)
• Add the contact to another group
• Add a label to this contact - Remove the contact from future sequences?

5. Select + Add a message to set up Message #2
6. The settings for Message #2 - Message #9 are similar to Message #1, except for the Waiting time after the first message field.
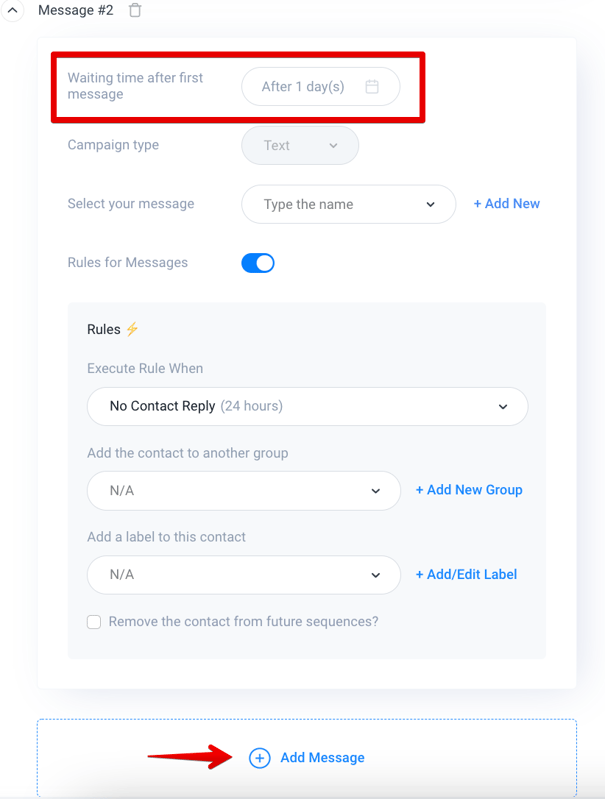
7. Click Send campaign after Message #2 -Message #9 to send all the messages set up in the drip campaign.
Note:
• After Message #9 you can only click Send campaign. It's not possible to set up more than 9 messages in the drip campaign
• In Waiting time after the first message field user must choose the time period the corresponding Message will be sent after the previous message was sent. ”1 Day” is the pre-populated value for this field. You can not select a value, which is <1 day.
• If Send campaign button is disabled, please check your settings and make sure all fields are set up.
• From the Drip campaign, you can Add/Edit New Groups/Labels/Message
• Each message in the drip campaign is charged according to the SMS pricing of your plan.