Keyword campaigns allow you to trigger an auto-reply based on the pre-set Keyword included in your contact's message.
You can create two types of Keyword campaigns:
Check this video for details or follow a step-by-step guide below:
Keyword Campaign without 1st message:
This type of campaign allows you to set the system to monitor incoming messages you receive for the pre-set Keyword and automatically send a Reply Message when the SMS that contains the Keyword is received.
To set up this campaign:
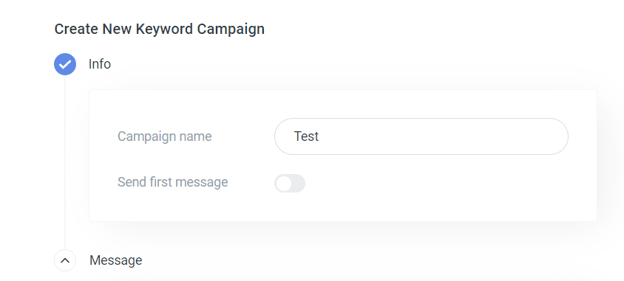
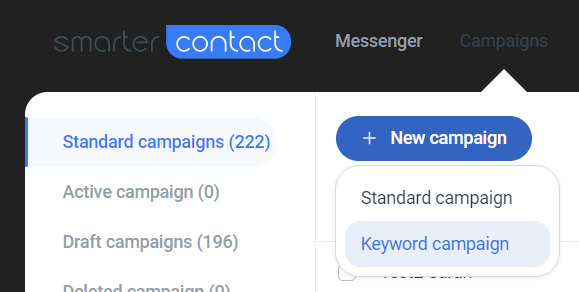
- Select +New campaign -> Keyword campaign

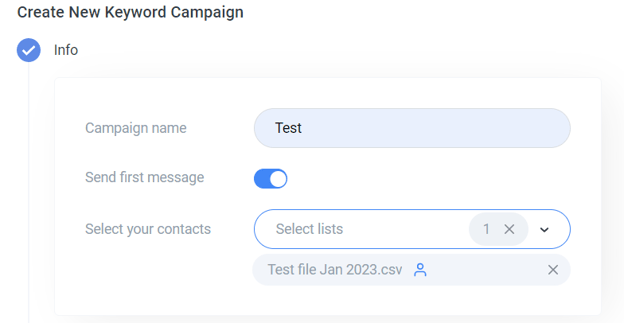
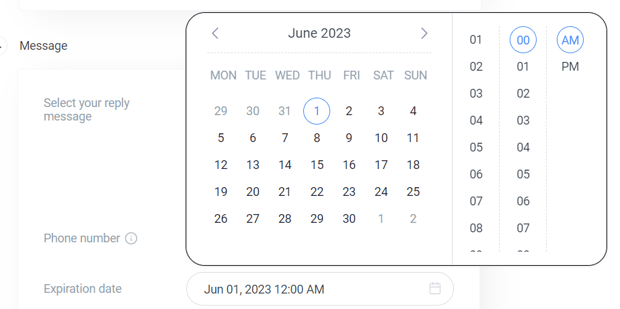
- Set the name of the campaign and leave the "Send first message" toggle disabled
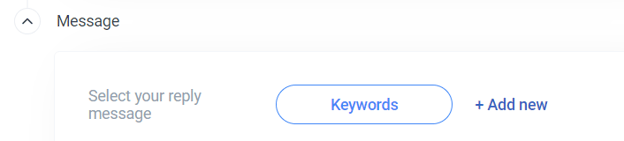
- Hit Keywords to select a pre-saved keyword template or hit +Add new to create a new one
- Select the phone number. Note, this is the phone your leads will be messaging the Keyword to, and the system will monitor the incoming texts to this number only.

- Set the expiration date. The system will stop monitoring inbound messages for the Keyword and send auto-responses on this date.

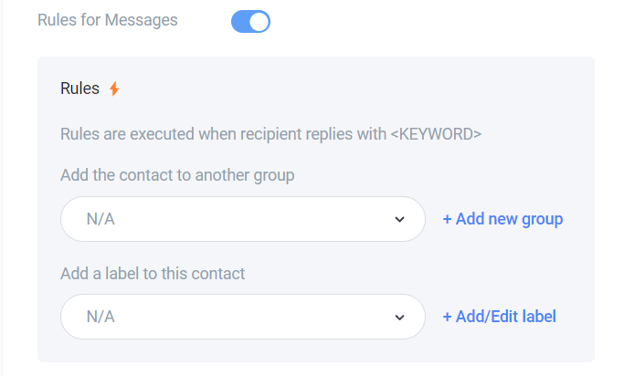
- Set the rules (optional). You can set the system to automatically add a contact to a group or assign a label to the contact that replies with the Keyword.
- Hit Next -> Confirm
Note: to start a Keyword Campaign without 1st message, you need to have at least $25 on your balance and auto-recharge enabled to cover the cost of incoming messages and auto-replies triggered.
Once you hit confirm, the campaign is Active, and the system starts monitoring inbound messages to the set number for the keyword and sending auto-replies.
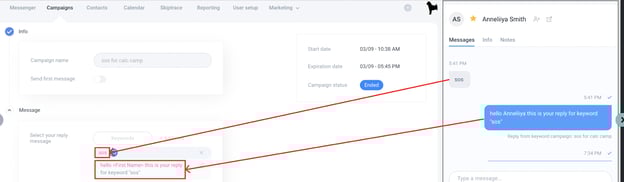
Tip: If the contact that sends an SMS with the keyword doesn't exist with the same phone number in your account, such contact will be added to your All Contacts tab with First Name = "N", Last Name = "A" and the phone number that sent the keyword.
Keyword Campaign with 1st message
This keyword campaign combines the functionality of the Keyword campaign and a basic SMS campaign, allowing you to first send a message to all contacts in the selected group and then also set the Keyword and auto-reply logic.
To set up this campaign:
- Select +New campaign -> Keyword campaign
- Set the name of the campaign, enable the "Send first message" toggle, and select the Group of your contacts:
- Select your first message as you would when sending a regular campaign. This would be the message sent to all contacts in your selected group.
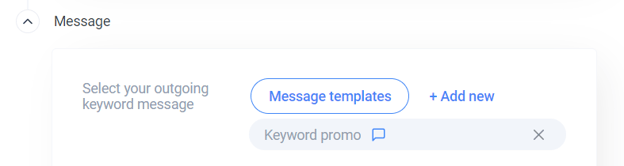
- Hit Keywords to select a pre-saved keyword template, or hit +Add new to create a new one.

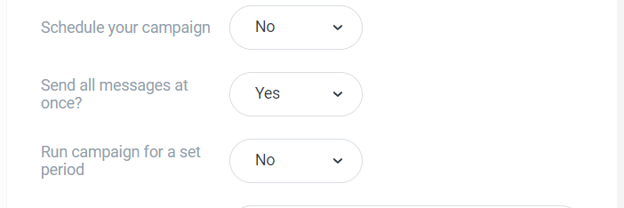
- Add the campaign settings. These will apply to your first campaign message only:
- Select the phone number. The system will use this phone to send the first message to your selected group and monitor the replies to this number for the set Keyword.

- Set the expiration date. The system will stop monitoring inbound messages for the Keyword and send auto-responses on this date.
- Set the rules (optional). You can set the system to automatically add a contact to a group or assign a label to the contact that replies with the Keyword.

- Hit Next and complete the click-through by hitting Send for each of your first message previews.
- Confirm sending the campaign.